


How to install a lace front wig? Understand the steps necessary to achieve a perfect, as well as natural, appearance when installing a lace front wig.
A realistic and secure look with a lace wig starts with understanding the best installation methods. Whether you're new to wigs or refining your skills, it pays to know the techniques that lead to a flawless finish. And that does not only mean a skilful application; it also includes steps leading up to it and consequent maintenance thereafter. But midway through this process, the actual installation itself requires a healthy dose of knowledge and skill. And again: everything matters—from knowing how to install a lace front wig in the first place to ensuring a natural-look hairline to making sure the unit holds up over time, especially when using a high-quality human hair piece.

Building the Ideal Foundation Before Use
Before applying your lace front wig, start with a clean, flat base for the most natural look. Wash your scalp thoroughly to remove all traces of product—any residue could affect how well the adhesive holds.
Long or short, your hair needs to be put into a style as close to your head as possible. Braid it down into cornrows or wrap it flat against your head and secure a wig cap over it. That brings us to the wig cap.
Adhesive Application and Lace Positioning

When your base is secure, it is time to work on the comfort and hold of your wig with adhesives. Depending on the duration you want your wig to remain in place, select from these options: wig glue, adhesive gel, or lace tape. Apply your chosen adhesive to the area just to the front of your natural hairline and wait until it becomes tacky. Position the wig in this setting.
How to install a lace front wig properly: lay the lace against the adhesive without rushing and without folding over any part of the lace on itself. Use a comb or edge stick to press the lace down firmly and gently for maximum adherence.
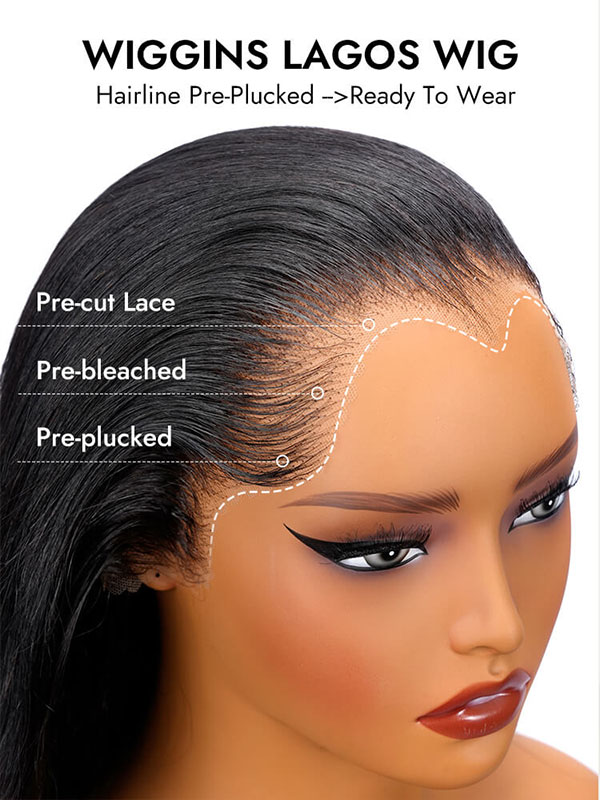
Cutting the Lace for a Natural Hairline
Once the lace has been pressed into the adhesive and dried for a few minutes, the next critical step in the installation process is trimming the excess lace. Using small, sharp scissors, cut the lace along your hairline in a gentle zigzag pattern rather than straight across—this helps avoid an artificial, rigid look.
And remember: if you trim too much lace, you can compromise the wig's fit; if you trim too little, the edges will show. So take your time with this part. Perfecting the lace cut is a key component of mastering installation.
Blending the Edges and Laying Baby Hairs
To enhance the illusion of a natural scalp even further, a lot of wig wearers decide to create baby hairs along the perimeter of the lace. These small, wispy hairs are typically pulled out from the wig, trimmed, and laid down using edge control or styling mousse. This step not only camouflages any visible lace but also adds a softer frame to your face and the way natural hair behaves around the hairline. A toothbrush or small edge brush can help shape these hairs into swoops or subtle curls that make the entire installation look effortlessly real.
Styling and Maintaining Your Look
Once the wig is securely in place, you can begin to style it in a way that best suits your mood or the occasion. You may choose to curl it with a wand, keep it sleek and straight with a flat iron, or go for a look that's got just the right amount of wave.
When discussing how to install a lace front wig, regardless of the approach you take, always remember to apply heat protection spray to the hair first. After all, you wouldn’t want to compromise the wig’s quality just for a single night out.
Recommendation

If you are looking for expert guidance and top-notch products for mastering how to install a lace front wig, WIGGINSHAIR is a fantastic option. We offer a wide variety of high-quality human hair wigs, installation tools, and tutorials designed to help you achieve the look you want, as seamless and realistic as possible. WIGGINSHAIR is an extension of some of the best hair available. We are dedicated to quality, as well as to the satisfaction of our customers.